Welcome to Our Project
At Gabes Chocolate factory we strive to create machines that produce elegant and edible fonts for baking application. Our printer can print in a variety of fonts, is easy to sanitize, and will set your cakes apart from your competition in style. Currently our machines are in the research and development phase and will be completed by December 12th. We will utilize Arduino application learned and applied in the Arduino tutorial tab to drive stepper motors and provide a 2-axis chocolate printer. Although this is already an available product Gabe's Chocolate Factory's goal is to provide this service to bakeries around the world for a much more affordable price than is currently available.
Statement of Work
This engineering team is designing a chocolate 3D printer for “Be Sweet” bakery. The printer’s primary goal is to print out chocolate letters for designs. The printer will be able to manually change the Z-axis for baked goods and print Belgian dark chocolate letters. This project will have all its planning and details displayed on this website for future student rebuilds if chosen to do so. The total length of time this engineering team will have to create a functional prototype is 16 weeks. The team is looking forward to learning and experiencing the entirety of the engineering process for this project.
Our printer
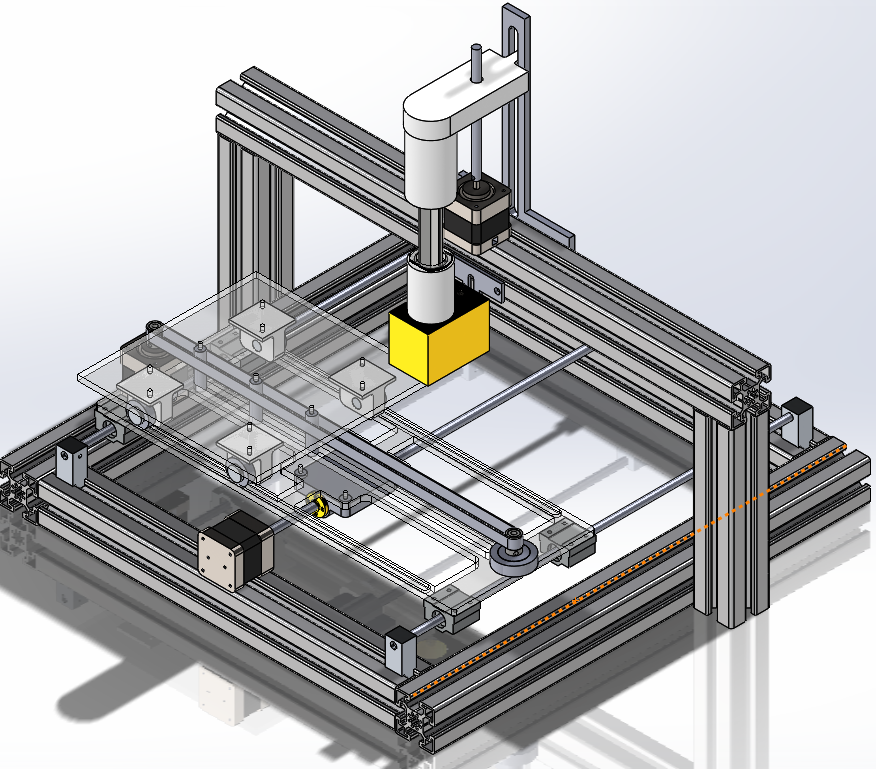
This image is taken from the assembly file of our 3D printer, and represents what we hope our finalized product will look like. We wanted to be able to share our project with everyone and inspire them to create their own or be able to replicate the work that we have done as a group. The assembly file and all of the relevant parts are available for download simply by clicking the image of the printer.
Cost Breakdown
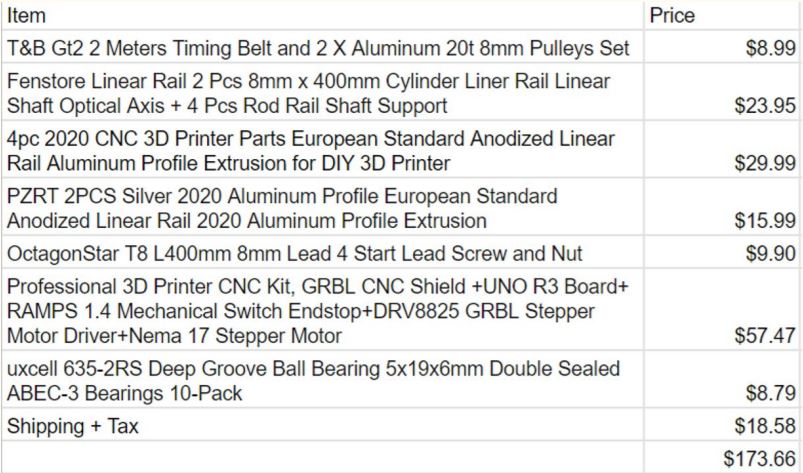
Here you can see the individual cost for each part of the printer that would be purchased instead of made. This image however does not consider the cost that are associated with the making of the additional parts. You can see a rough estimate for the final cost of the printer at the bottom of the image. Clicking on the image will open it up in anew tab so that it can be downloaded or zoomed in on.
Bill of Materials
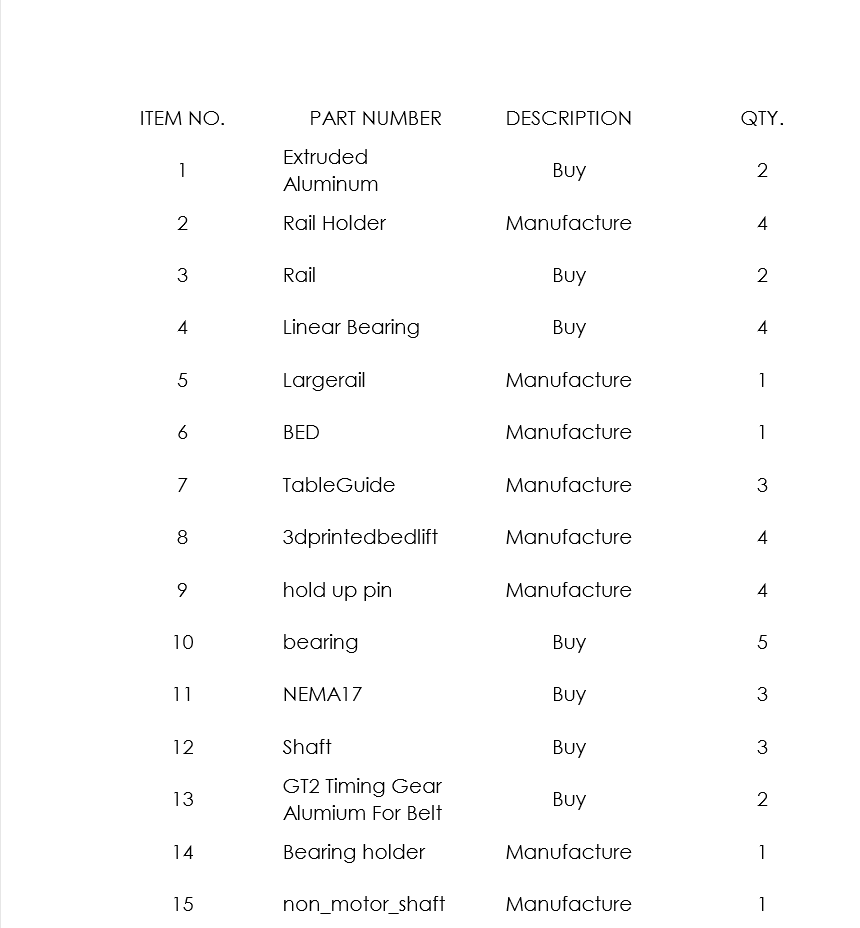
This is our complete bill of materials and it contains each part that wil lbe used in the construction of the printer as well as how many of each indivisdual part. The bill of materials also states whether each part is being made or bought from an outside vendor so that the part files or vendor can be easily located. For parts being made you can click on the image under the component drawings heading, and for parts being bought you can check out the complete list of items and vendors under the vendor links tab.
Component Drawings
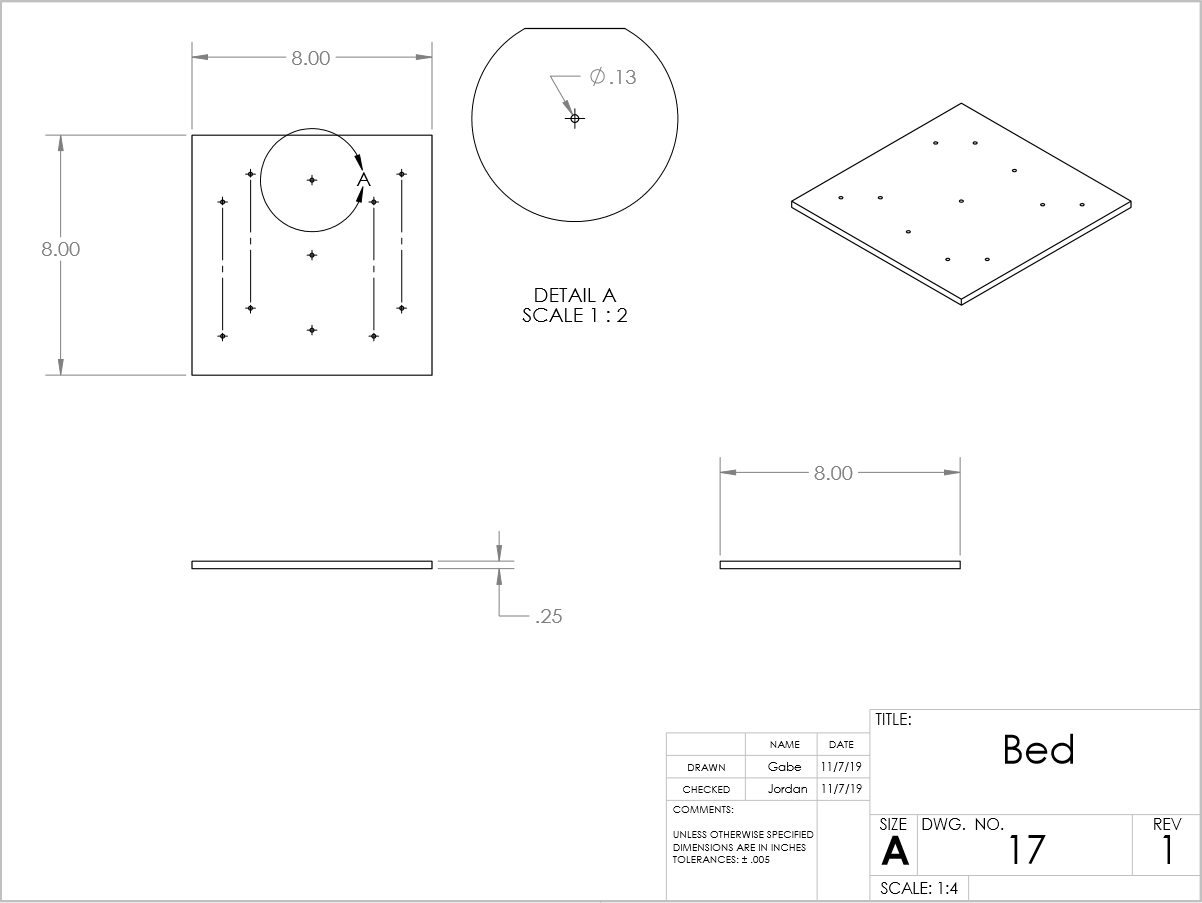
The image above is a link where you can download all the drawing files for the parts made by our group. These drawings contain all the necssescary dimensions for each part and are intended to help with the fabrication of all of the parts. These drawings should also serve as a guideline when creating new parts or improving upon the old ones.
Project Conclusions and Improvements
Gabe’s Chocolate Factory overall is still heavily in the design phase. There was some initial success with an accuracy on average of .5mm. Motor speed and feed rates need to be adjusted in order to have a bed that can accurately translate in a fully repeatable matter. A solution to the problem of the motors translating in a random direction needs to be solved. The full specifications are on the website in order to recreate the product. For anyone looking to recreate the product that is produced it is suggested that the motor couplers are redesigned and the extruder head needs to be researched in more detail. It is recommended that a very rigid structure is used to press the syringe. The syringe pushing force required should be measured and finite element analysis should be conducted to make sure the frame can handle the load.
Presentations
These are powerpoints our group has put together throughout the design process to document the various satges and changes that have been made to the project. The SRR is the earliest presentation and mainly documents the overall evaluation of which product our group was going to pick for the semester. It also sets a loose timeline and tries to narrow down some of the broader concepts of the project. The PDR documents the intial design of the printer as well as the evaluations done for selecting the best way to do each subsystem. This also documents some of the vendors that were intially considered. The CDR documetns the more finalized version of the printer and how each subsytem will work together. This presentation also documents the testing that will be done on the printer to conofirm that is is a functional product.
SRR Presentation
PDR Presentation
CDR Presentation
Final Presentation