






Arduino Tutorial
RF Transmission and Reception
In this tutorial, we will learn how to set up Radio Frequency (RF) communication between two Arduino boards using 433 mHz transmitter and receiver modules by utilizing the RadioHead library. This guide will help you set up wireless data transmission, allowing one Arduino to send numerical messages while another Arduino receives them and determines if the number is even or odd.
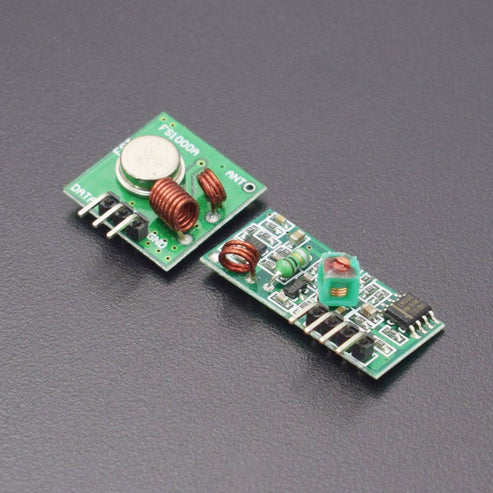

Application for Autonomous Rover Missions
RF communication is useful in autonomous rover missions for:
- Remote commands: The rover can receive instructions such as distances to travel or navigation waypoints.
- Sensor data transmission: The rover can transmit sensor readings back to a base station.
- Wireless coordination: Multiple rovers can communicate with each other to avoid obstacles or coordinate movements.
Required Hardware
To complete this tutorial, you will need:
- 2 Arduino boards (e.g., Arduino Uno)
- 1 RF 433MHz Transmitter Module
- 1 RF 433MHz Receiver Module
- Jumper Wires
- A breadboard (optional, for easy wiring)
- 2 USB Cable for Arduino
Required Libraries
We will use the RadioHead ASK Library for RF communication.
Download and install it from the following link:
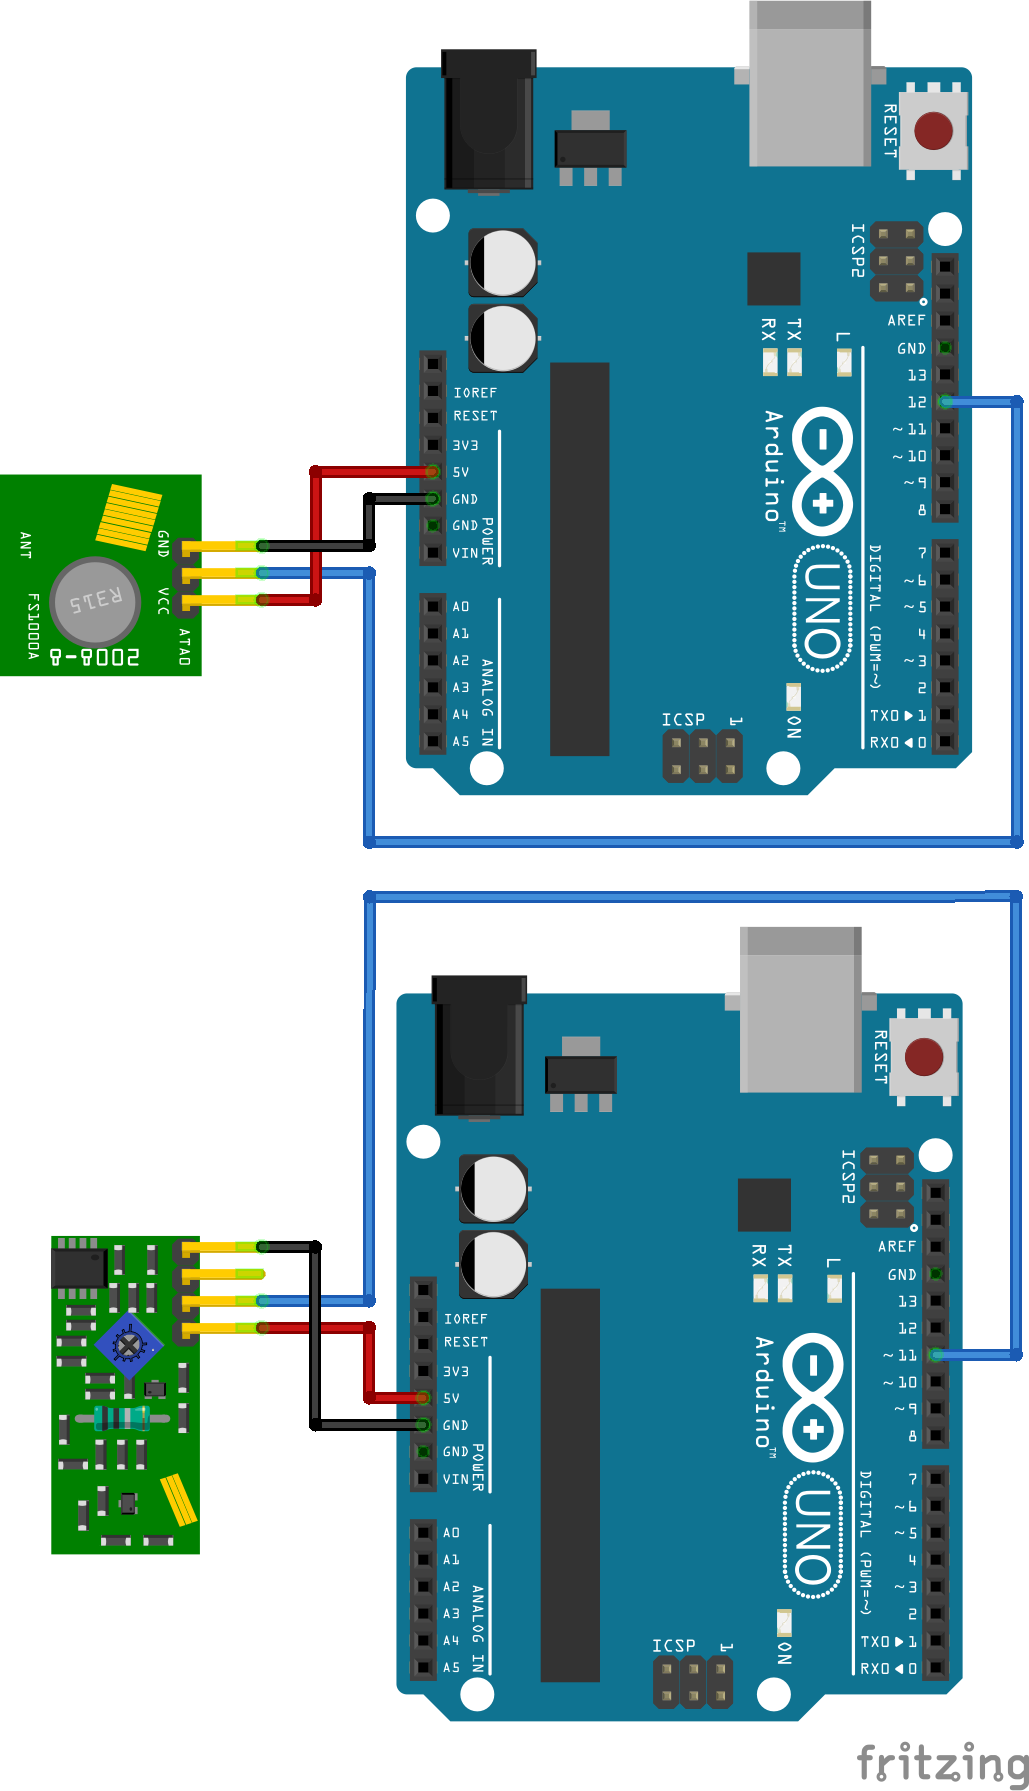
Wiring Diagram
Transmitter Wiring (Arduino → RF Transmitter)
| RF Transmitter Pin | Arduino Pin |
|---|---|
| VCC | 5V |
| GND | GND |
| DATA | Pin 12 |
Receiver Wiring (RF Receiver → Arduino)
| RF Receiver Pin | Arduino Pin |
|---|---|
| VCC | 5V |
| GND | GND |
| DATA | Pin 11 |
Transmitter Code
                                        #include <RH_ASK.h>
                                        #include <SPI.h>
                                        RH_ASK rf_driver;

                                        void setup() {
                                            Serial.begin(9600);
                                            if (!rf_driver.init()) {
                                                Serial.println("RF Module Initialization Failed!");
                                            } else {
                                                Serial.println("RF Module Initialized.");
                                            }
                                        }

                                        void loop() {
                                            Serial.println("Enter a number (0-99) to send:");
                                            while (Serial.available() == 0);
                                            int num = Serial.parseInt();
                                            while (Serial.available()) Serial.read();
                                            if (num < 0 || num > 99) {
                                                Serial.println("Invalid input. Enter a number between 0-99.");
                                                return;
                                            }
                                            char message[13];
                                            snprintf(message, sizeof(message), "X%02dZZZZZZZZZ", num);
                                            Serial.print("Sending: ");
                                            Serial.println(message);
                                            rf_driver.send((uint8_t *)message, strlen(message));
                                            rf_driver.waitPacketSent();
                                            delay(1000);
                                        }
Receiver Code
                                        #include <RH_ASK.h>
                                        #include <SPI.h>
                                        RH_ASK rf_driver;

                                        void setup() {
                                            Serial.begin(9600);
                                            if (!rf_driver.init()) {
                                                Serial.println("RF Module Initialization Failed!");
                                            } else {
                                                Serial.println("RF Module Initialized.");
                                                Serial.println("Waiting for messages...");
                                            }
                                        }

                                        void loop() {
                                            uint8_t buf[13] = {0};
                                            uint8_t buflen = sizeof(buf);
                                            if (rf_driver.recv(buf, &buflen)) {
                                                if (buf[0] == 'X') {
                                                    int receivedNum = atoi((char*)&buf[1]);
                                                    Serial.print("Message Received: ");
                                                    Serial.println((char*)buf);
                                                    Serial.print(receivedNum);
                                                    Serial.println(receivedNum % 2 == 0 ? " is even." : " is odd.");
                                                } else {
                                                    Serial.println("Invalid message format received.");
                                                }
                                            }
                                        }
References
Conclusion
By following this tutorial, you have successfully implemented wireless communication between two Arduinos using RF 433MHz modules.